Wednesday, October 4, 2017

September Card Chain Challenge: Pirates!!


Hello and welcome!  I am so so so very behind with posts lately, so please excuse my absence...we're so terribly busy as a family right now!  Nevertheless, its time for another CCC reveal!  The September Card Chain Challenge was so fun for me...I just love Pirates!  

If you're new to The Card Chain Challenge, let me tell you, its wonderful!  Card makers from all over the globe get to exchange their beautiful creations and its quite inspiring!  What a fun way to make new friends! 

So, as with any challenge, there are a few rules.  You must stick with any one (or more if you are so inclined) of four different options.  For September, our options were:

1. Color Palette option: 


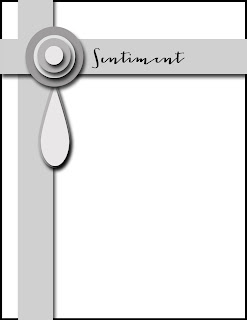
2. Sketch option:


3. Theme option: Pirates / In the Jungle / Friendship

4. Product/Technique option: Graphic 45 / Metal Charms / Tri-Fold Cards


I wanted to do something a little different this month and decided to use a card kit that I'd gotten not too long ago.  Have you checked out the card kits from Scrapping for Less??  They're such a great value and oh so cute!!  The products I used in my card come from the June kit and feature Scrapberry's papers and stickers by Express Yourself.  So, let's get to it shall we?! ;D


Aside from being super cute, the SFL card kits come with a sketch sheet that make it incredibly simple to pull together a card...or four ;)  I used one of the sketches included with my kit to pull this cutie off...isn't that little guy adorable?!


Since anything associated with pirates and buried treasure usually looks worn and aged, I was sure to ink most of my edges with Distress Ink.  It also helps them to stand out against one another since there were so many elements to this sketch.  I heat embossed my little sentiment strip and die cut the "Thanks" out of glittered cardstock.


Lastly, I added some dimensional tape to the backs of a few of the pieces and adhered everything into place!  This photo shows the layering and dimension a little better.  I did forget to photograph the inside of the card but the sentiment continues with "for showing me the way!", which I thought was absolutely perfect for the map background on the red patterned paper, the ships steering wheel and the telescope sticker...they all tied together so nicely!  Hopefully Dawn in New Zealand will think so too...she was my recipient this month!  Hi Dawn! :D

So that's it for this month...Big THANKS for dropping by today and here's to a wonderful October!

Hugs, 

 photo Katie Blog Signature_zpsbi1lqemh.png

Thursday, September 7, 2017

August Card Chain Challenge Featuring MFT Up in the Air


Hi there!  Its time for the August Card Chain Challenge reveal!  If you're new to The Card Chain Challenge, let me tell you, its wonderful!  Card makers from all over the globe get to exchange their beautiful creations and its quite inspiring!  What a fun way to make new friends! 

So, as with any challenge, there are a few rules.  You must stick with any one (or more if you are so inclined) of four different options.  For August, our options were:

1. Color Palette option:


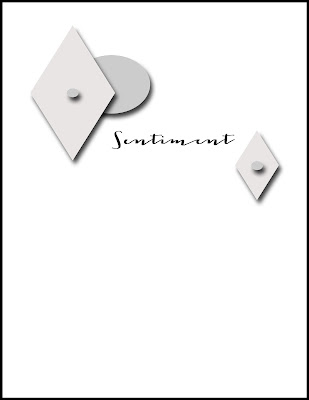
2. Sketch option:


3. Theme option: Ships / Dogs / Friendship

4. Product/Technique option: Memory Box / Stencils / Tea Bag Folding

With this month's card, I thought that the sketch would be absolutely perfect with hot air balloons!  And I just happened to have the Birdie Brown Up in the Air stamp set from My Favorite Things... ;D 


These images look so sweet in the August color scheme too, don't they?!  And that little doggie (another of the challenge options) peeping over the basket??  Oh my goodness, I just fell in love with him!


I began by stenciling the background using a cloud stencil and distress ink.  After that, I stamped and colored my images before running them through the Big Shot, along with the background panel.  The banner on the large balloon is paper pieced and coated in glossy accents to give it some shine.  I wanted to layer the background panel onto a piece of patterned paper in a subtle print so they wouldn't compete with one another, but also to make my clouds really pop!


Next, I die cut the "hugs" from glitter cardstock and layered it up a few times to give good dimension.  I heat embossed the sentiment in white onto Doll Pink cardstock, which is the closest I could come to magenta.  Lastly, I adhered all of my pieces to the background panel and added a few sequins to give some sparkle!

I had so much fun with this month's challenge...I hope you'll decide to join in sometime!  Thanks so much for stopping by!  Until next time, go get your craft on!

Hugs,

 photo Katie Blog Signature_zpsbi1lqemh.png

Monday, August 14, 2017

Love From Lizi July 2017 Kit


Hey y'all!  Happy Monday!  Today I'm sharing the cards I've created with the Love From Lizi July 2017 card kit...and it's already August 14th!  Can you believe it?!  Me neither... ;D  If you're curious as to what's included in the kit, please feel free to click here.  The kit sold out long ago, but this will give you a great idea of just how versatile and packed with goodies these kits are.

Jumping right on in, here is card number 1!

 
The border stamp from the stamp set in the kit looked like it would be so fun to make a pattern with...so I repeat stamped it onto water color cardstock and then heat embossed using silver embossing powder.  I made sure to leave enough space to stamp the sentiment because I wanted a one layer card, and this is about as one layer as I get! :D


I colored the insides of the half-medallions using Zig markers and a water brush.  For finishing touches I used the Nuvo drops and twine from the kit, and a small pearlescent button from my button jar!

Onto card 2...


Using some of the flowers in the stamp set, I created a background directly on my card base using a light gray ink to get a tone on tone effect.  The rest is just some die cutting with the patterned papers and a vellum panel using rectangle and frame dies, and then layering it all together...


The tag is raised with foam tape and I added a twine bow and some sequins to finish the card off.


For card number 3, I knew I wanted to use the medallion vellum panel, but I didn't want to cut it down.  Instead I die cut a frame for the panel, backed it with some patterned paper and added a panel underneath that I'd inked with Work Lipstick Distress Oxide ink and splashed with water for interest.  Next, I added some of the gems from the kit to the vellum panel in a pattern that I thought would mimic a dahlia...and I love it! 
  

Here is a closer look at the bottom panel.  I added one of the tags for my sentiment and tied it onto the card with the yellow twine from the kit.  Doesn't the Worn Lipstick color just go perfectly with this kit!?!  


I normally like to use one of the MFT Blueprints dies to create at least one of my cards, but since I had my Sizzix dies out, I decided to use one of the Flip-Its Card dies instead!  This one is the Scallop Oval. 

These dies make pulling a card together so quick, easy, and rather brainless...perfect for me!

 
With these dies, the inside of the card matters just as much as the outside since you can see them both!  I used the bicycle die from the kit and added it to heart doily and coated it with Glossy Accents to give it some more dimension.  Another sticker from the kit serves as my sentiment and card number 4 is done!


Card number 5 is a shaker!  Lol...I just couldn't bear to cut into this vellum panel, so it made the most sense to frame it up and make a shaker...and I don't know about you, but the perfect day for a bike ride in my mind is always with fluffy white clouds in the sky!


I inked my clouds, added a few sequins and gems and this one is done in a matter of minutes!


For card 6, I wanted to cut out the medallions from the vellum strip and use them to border my card.  I also wanted them to stand out so I backed them with glitter washi tape.  The sentiment is stamped repeatedly onto a white panel that I used edge dies to give a scalloped border to.


If I had this one to do over again, I would have added a plain vellum strip, vertically, over the sentiment panel.  You can see in this image how the Distress Oxide ink made little squiggly lines inside the stamped Hellos.  I'm not sure I'm liking that, but oh well!  


Card 7 came together just from my playing with the supplies out on my table...I love a good collage!  The word die and sentiment are the only thing on this card that did not come in the kit, but they went perfectly with the tab sticker that said "magic" so I had to use them!


These black and gold gems that Lizi put in this kit are just so much fun to use...they add the smallest detail but make a great impact!  I hope she continues to put more of these in the kits. Wink, wink! :D


So by this time I've got loads of scraps on my table, right??  I'm sure you know what I mean!  For card 8, to use up these scraps, I made a strip panel from them...so fun!  I adhered strips of the patterned paper scraps to a scrap piece of cardstock and die cut a rectangle to make my base panel.


All that's needed next is a vellum panel to frame my sentiment, which is a Simon Says Stamp word die set that I coated with Glossy Accents.  I added a few sequins and Nuvo drops to give a little more sparkle and voila!  


Card number 9 uses one of my favorite techniques...masking!  I knew the bicycle and stamp set were not scaled for each other, but using them together was a must for me.  So, I stamped out a basket full of cartoonish flowers in various ink colors and added a little accent to the basket with a gold gel pen, then die cut my bouquet with a Pretty Pink Posh tag die.  
 

I die cut the bicycle from silver glitter washi over white cardstock and added it onto the basket making sure my placement was normally where a basket would sit on top of a bicycle!  I wanted a really whimsy feel to this card since the scale was so far off and it seemed to work wonderfully.  I think this one is my favorite!


And here she is, last but not least, a sweet little Pure Innocence girl at the beach!  She and the other images are colored with Copics and sparkled up with a shimmer pen.  This stamp set was perfect for this piece of patterned paper from the kit...I love how it looks chalk-board-ish!


I layered up a few other elements from the kit, used some die cut clouds and she's done!  That's all ten people...I hope you had as much fun with your kit as I did!

Until next time, go get your craft on!

Hugs, 

 photo Katie Blog Signature_zpsbi1lqemh.png